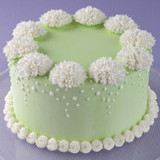
Stunning Succulent Cakes

Stunning Succulent Cakes

Learn how to use the decorating tips in your collection to create amazing blooming succulents. Great for tea parties, birthdays, bridal showers and weddings, these stunning mini cakes are a great way to showcase your decorating skills. Mix and match succulent styles and colors to create the edible garden of your dreams!
  • Skill LevelIntermediate
    Amount3

Instructions

Click to mark complete

  1. Ingredients:

    • White Ready-to-Use Decorator Icing – 4.5 lb. Tub (2 cups needed)
    • White Ready-to-Use Decorator Icing – 1 lb. Can (6 cups needed)
    • Leaf Green Icing Color*
    • Moss Green Icing Color*
    • Sky Blue Icing Color*
    • Garden Icing Colors Set (Aster Mauve and Juniper Green used)*
    • Favorite cake mix or recipe (1½ cups batter needed)

    *Combine Moss Green and Sky Blue icing colors to get green-blue color shown. Combine Juniper Green and Leaf Green icing colors to get dark leaf green color shown.

  2. Bake cakes.Bake and cool six cake layers for three 4 in. high cakes. Using icing from tub, fill, stack and crumb coat cakes.
  3. Divide 6 cups icing equally among six bowls. Using Aster Mauve icing color, tint one bowl light mauve; one bowl dark mauve. Using Juniper Green icing color, tint one bowl light green; one bowl dark green. Tint remaining bowls green-blue and dark green using color combinations provided.
  4. Pipe succulents.All succulents are piped on flower nail prepared with flower square. Once succulent is complete, remove flower from square, place flower on cake and apply new flower square to nail.
  5. Desert Rose Flower:Prepare decorating bag with tip 12. Stripe bag with light mauve; fill with light juniper green. Pipe mound, about 3/8 in. high. Switch to tip 59, hold bag at 90 degrees with inner curve in front of mound, pipe petal over top of mound. Rotate flower nail 1Ž4 of turn and repeat to form a cross over the mound. With bag at 45 degree angle, inner curve facing mound and tip touching surface, pipe curved petal, moving bag up and down, around 1/3 of mound. Turn nail slightly. Starting behind previous petal so they overlap, pipe next petal, using same motion, covering 1/3 of mound. Repeat to close petal row. Continue piping and turning around mound, gradually increasing petal size at start of new petal row. Stop when desired size is reached.
  6. Echeveria: Prepare decorating bag with coupler and tip 352 (for large plants) or 349 (for small plants). Stripe bag with dark mauve; fill with dark leaf green. Pipe circle of pull-out leaves. Fill circle with pull-out leaves.
  7. Chrysanthemum: Using icing bag from Echeveria plant, change tip to 81. Using chrysanthemum technique (omitting mound at beginning), pipe mum, pulling out petals slightly longer than mum flower.
  8. Blooming Cactus: Prepare decorating bags with tip 199 and dark juniper green icing, tip 1 and white icing and tip 224 and dark mauve icing. Using dark green icing, pipe stars of assorted heights. Pipe white dots down grooves of stars. Top with mauve drop flower.
  9. Star Gazer:Prepare decorating bag with tip 16 and light juniper green (for stars) or stripe bag with light mauve and fill with green-blue icing and tip 352 (for leaves). Pipe mound, about ¾ in. high. Cover mound with pull-out stars or leaves.
  10. Stacked Petals:Prepare decorating bag with tip 102. Stripe bag with light mauve icing and fill with green-blue icing. Using apple blossom technique, pipe petals for base. Pipe three more rows of petals on top of first, varying amount and size.
  11. Prepare two decorating bags, one with tip 363 and dark leaf green icing, the other with tip 6 and light juniper green icing. Fill in empty spaces on cake with tip 363 pull-out stars and tip 6 dots.

    Makes 3 mini cakes.

Notes

How To

Reviews